Sending and Managing Signing Requests
Last updated: September 15, 2026
This article walks through sending a signing request, what the signer experiences, how to track status, and how completed documents flow into your EHR.
Starting a request
There are two ways to start:
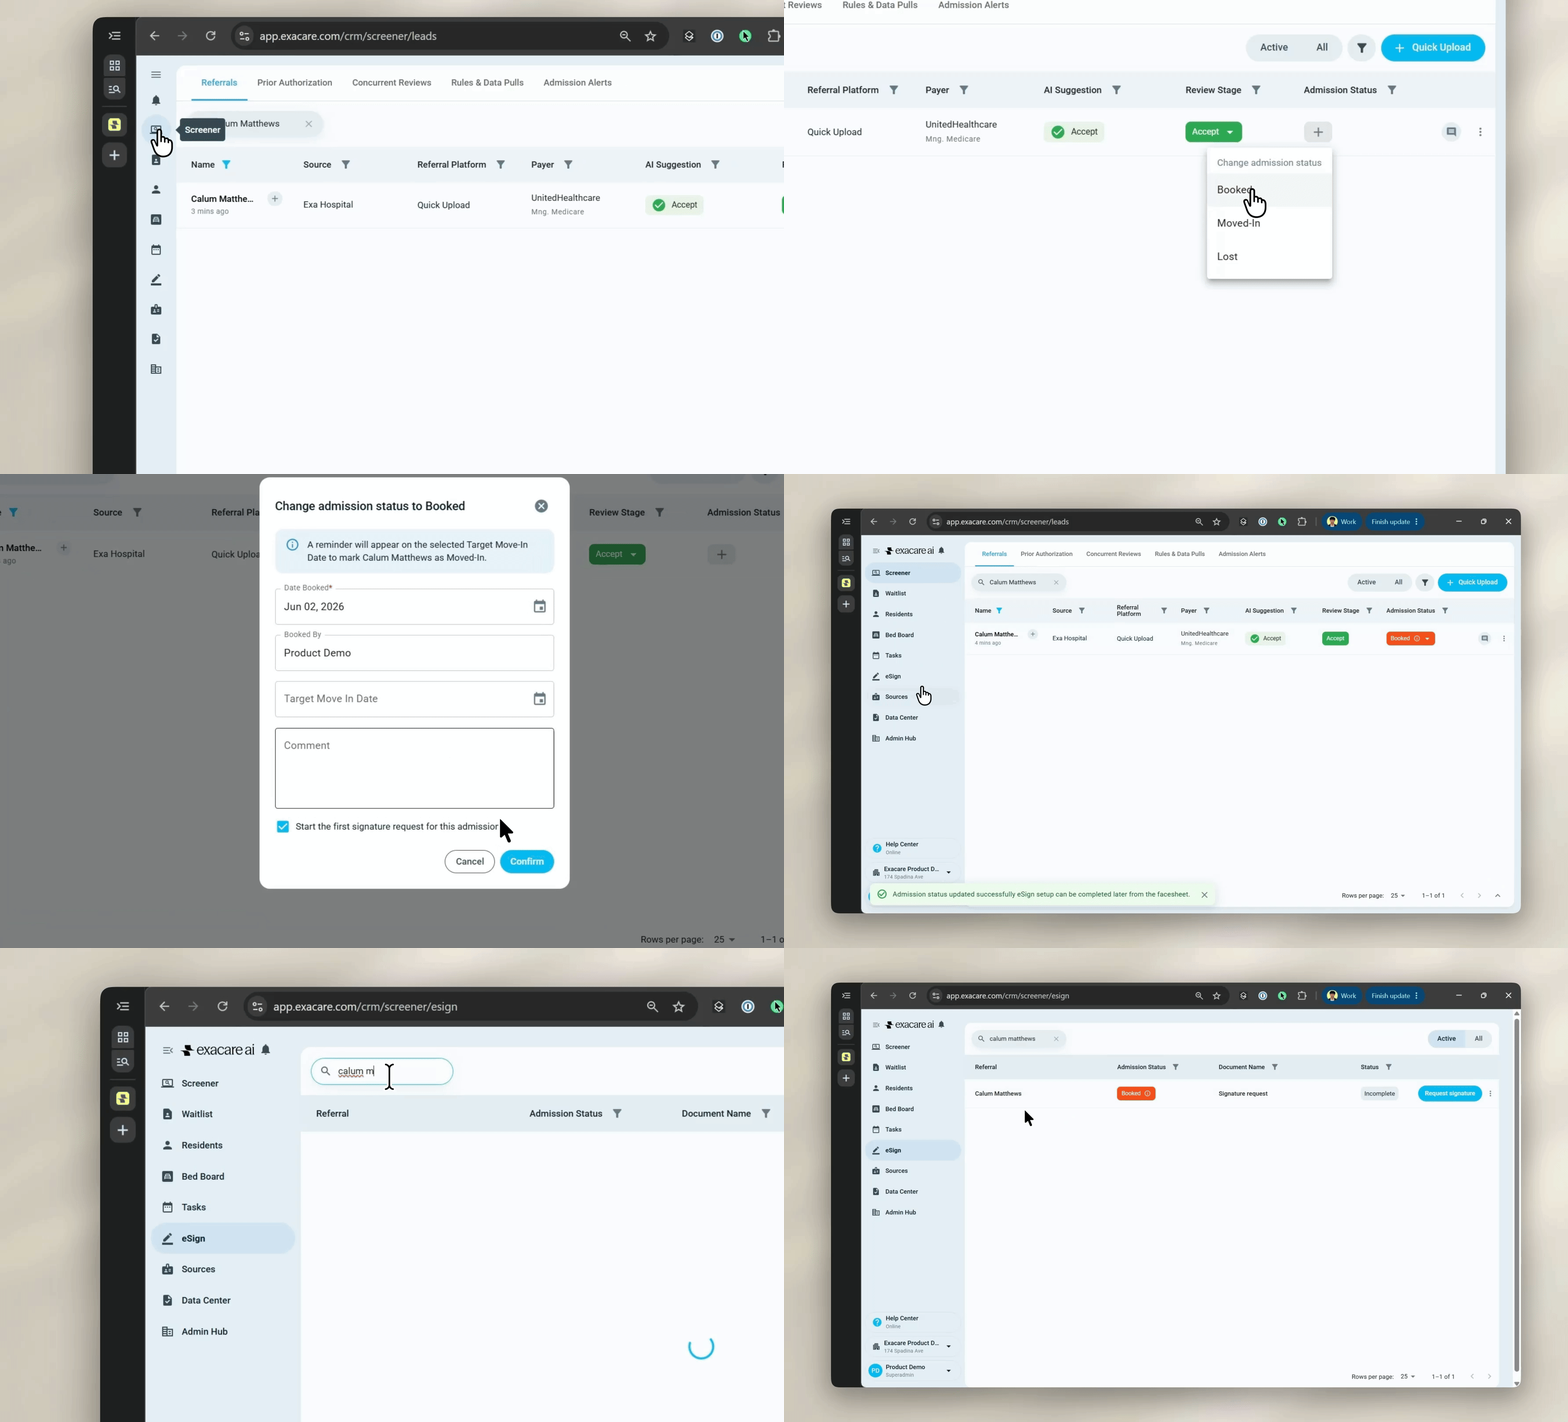
From the booking flow:
In the referral, change Admission Status to Booked or Moved-In
A new checkbox appears at the bottom of the modal: "Start the first signature request for this admission". The checkbox is checked by default for first-time bookings and automatically creates one signature request in the eSign grid. Uncheck the box for readmissions or residents who already have admission paperwork on file, and no request will be created.
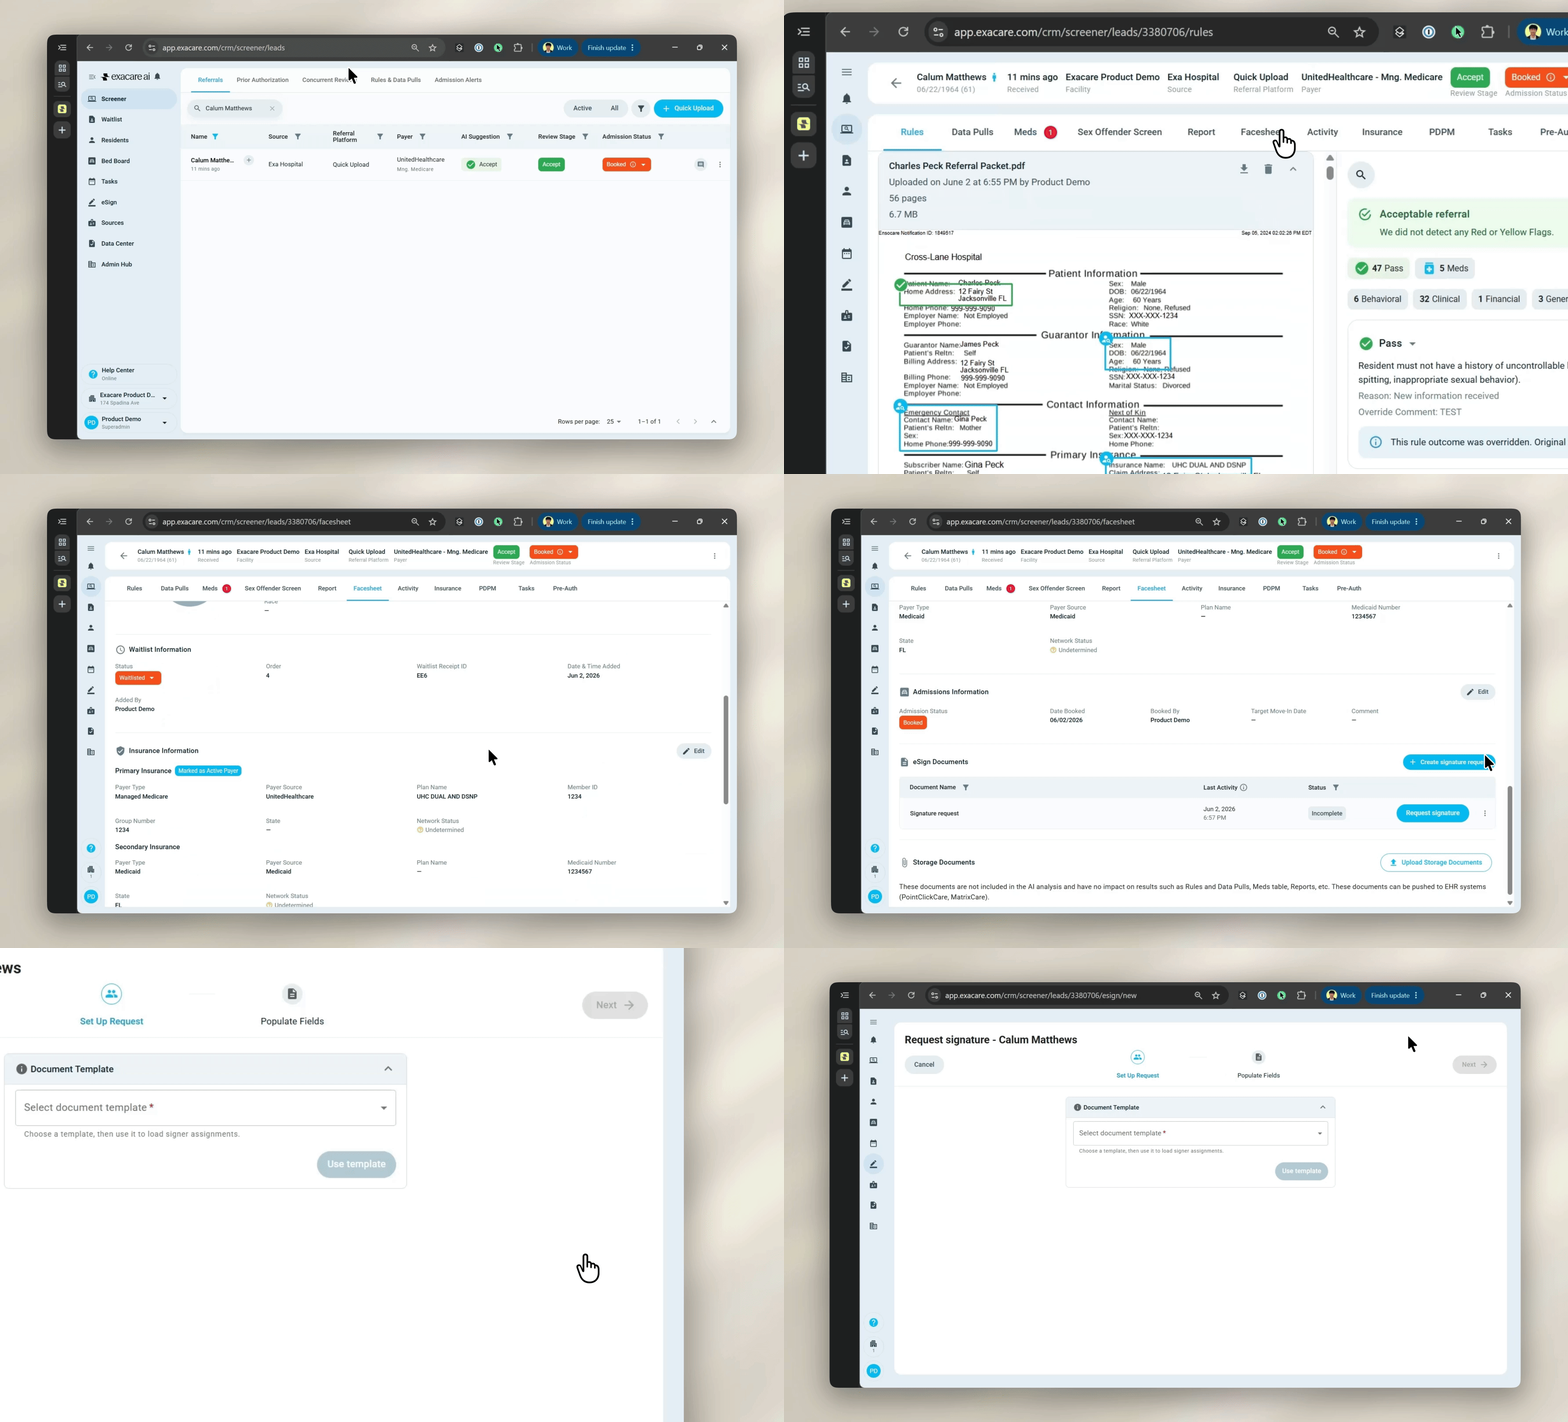
From the referral facesheet:
Open the referral and scroll to the bottom of the Facesheet tab
Click Request signature under eSign Documents
Steps to send
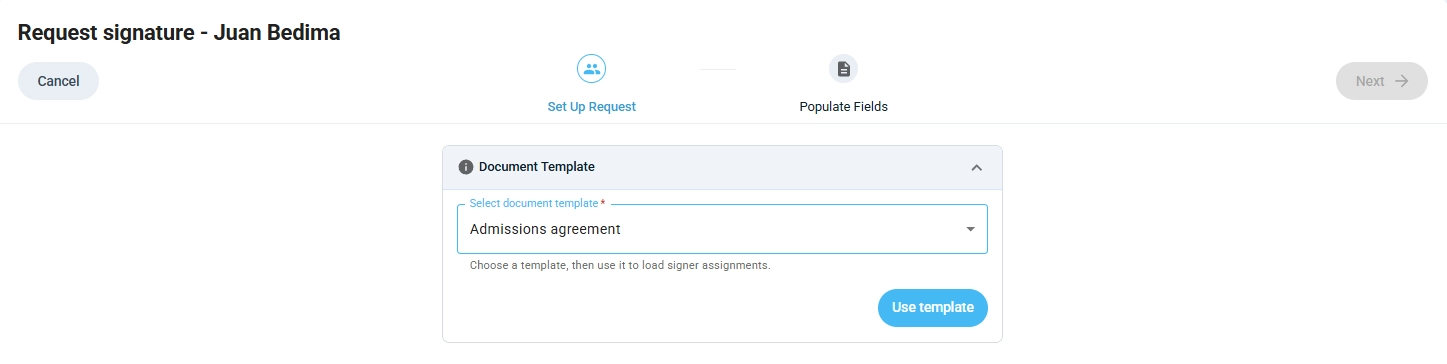
Select a template. Pick the document you want the signer to complete. If the template might be signed by either the resident or a representative, choose the version that matches the actual signer (see Setting up Templates for this pattern).
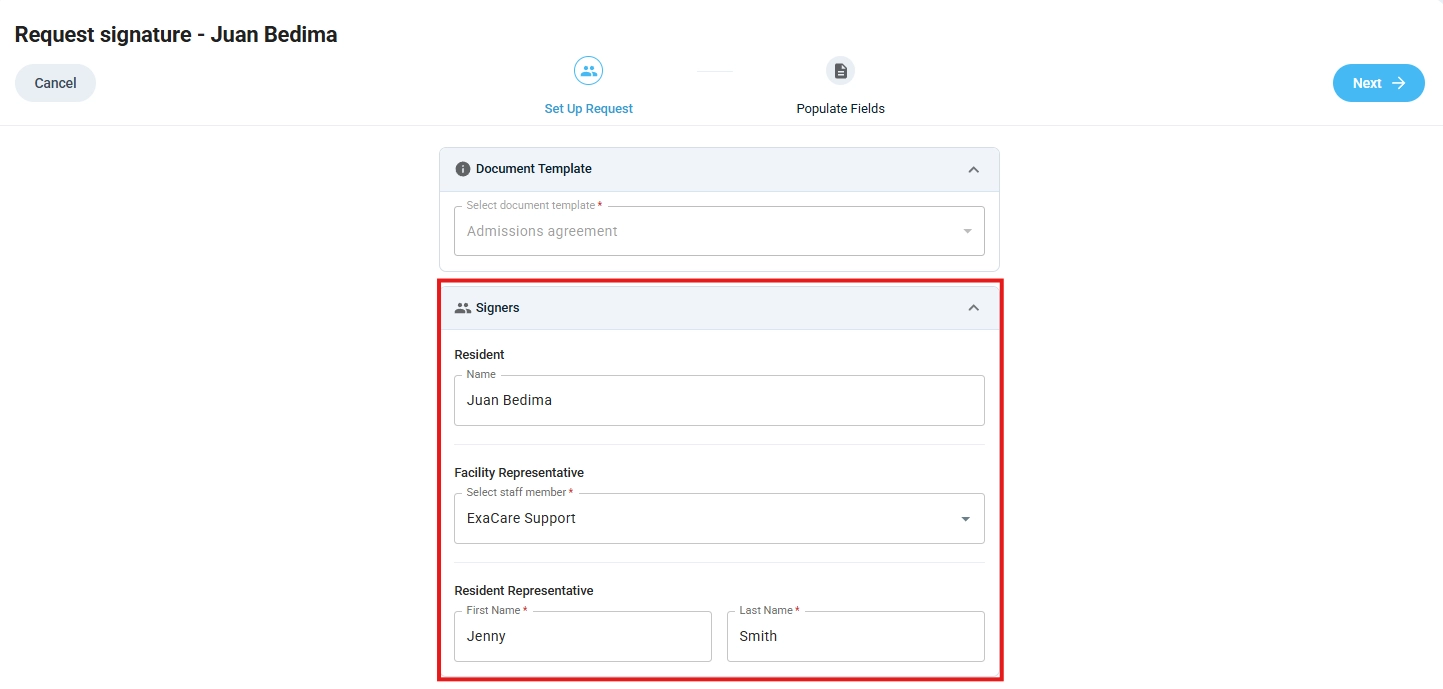
Assign signers to roles. Each role defined on the template needs a real signer:
Facility representative defaults to the user sending the request.
Resident defaults to the referral name on the lead.
Custom roles (for example, Resident representative) need the signer's name and email filled in manually.
Review sender fields. Sender fields are automatically populated from the info within exacare's platform (e.g., referral facesheet, facility info), while some sender fields (i.e., Custom Text fields) must be manually populated and reviewed before sending.
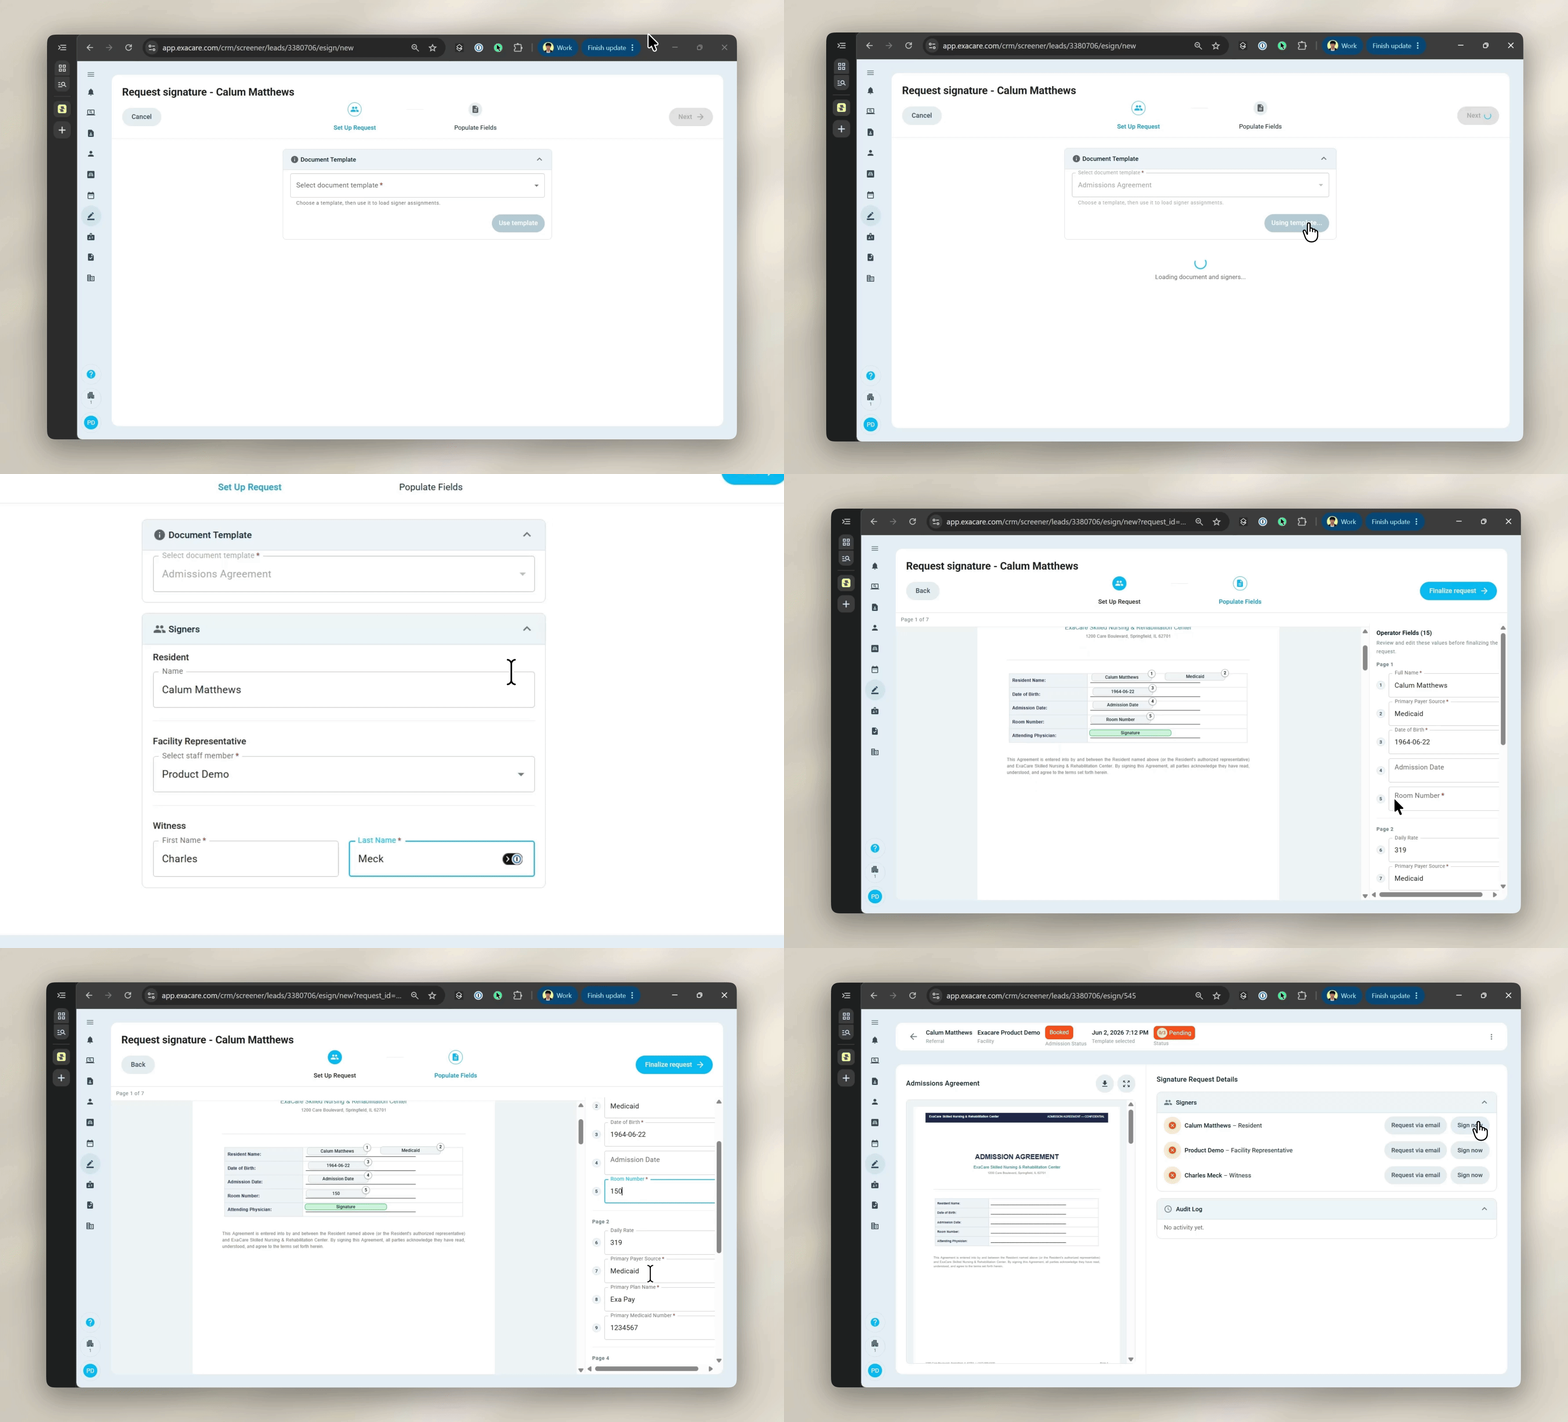
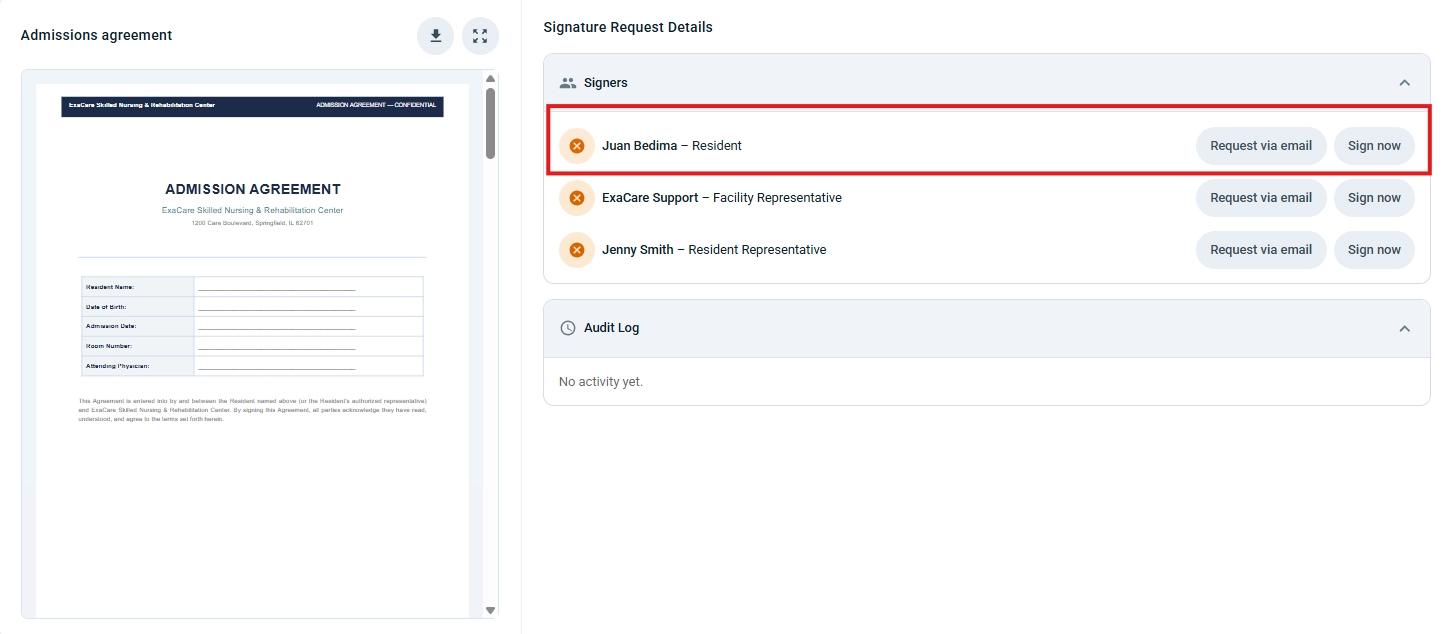
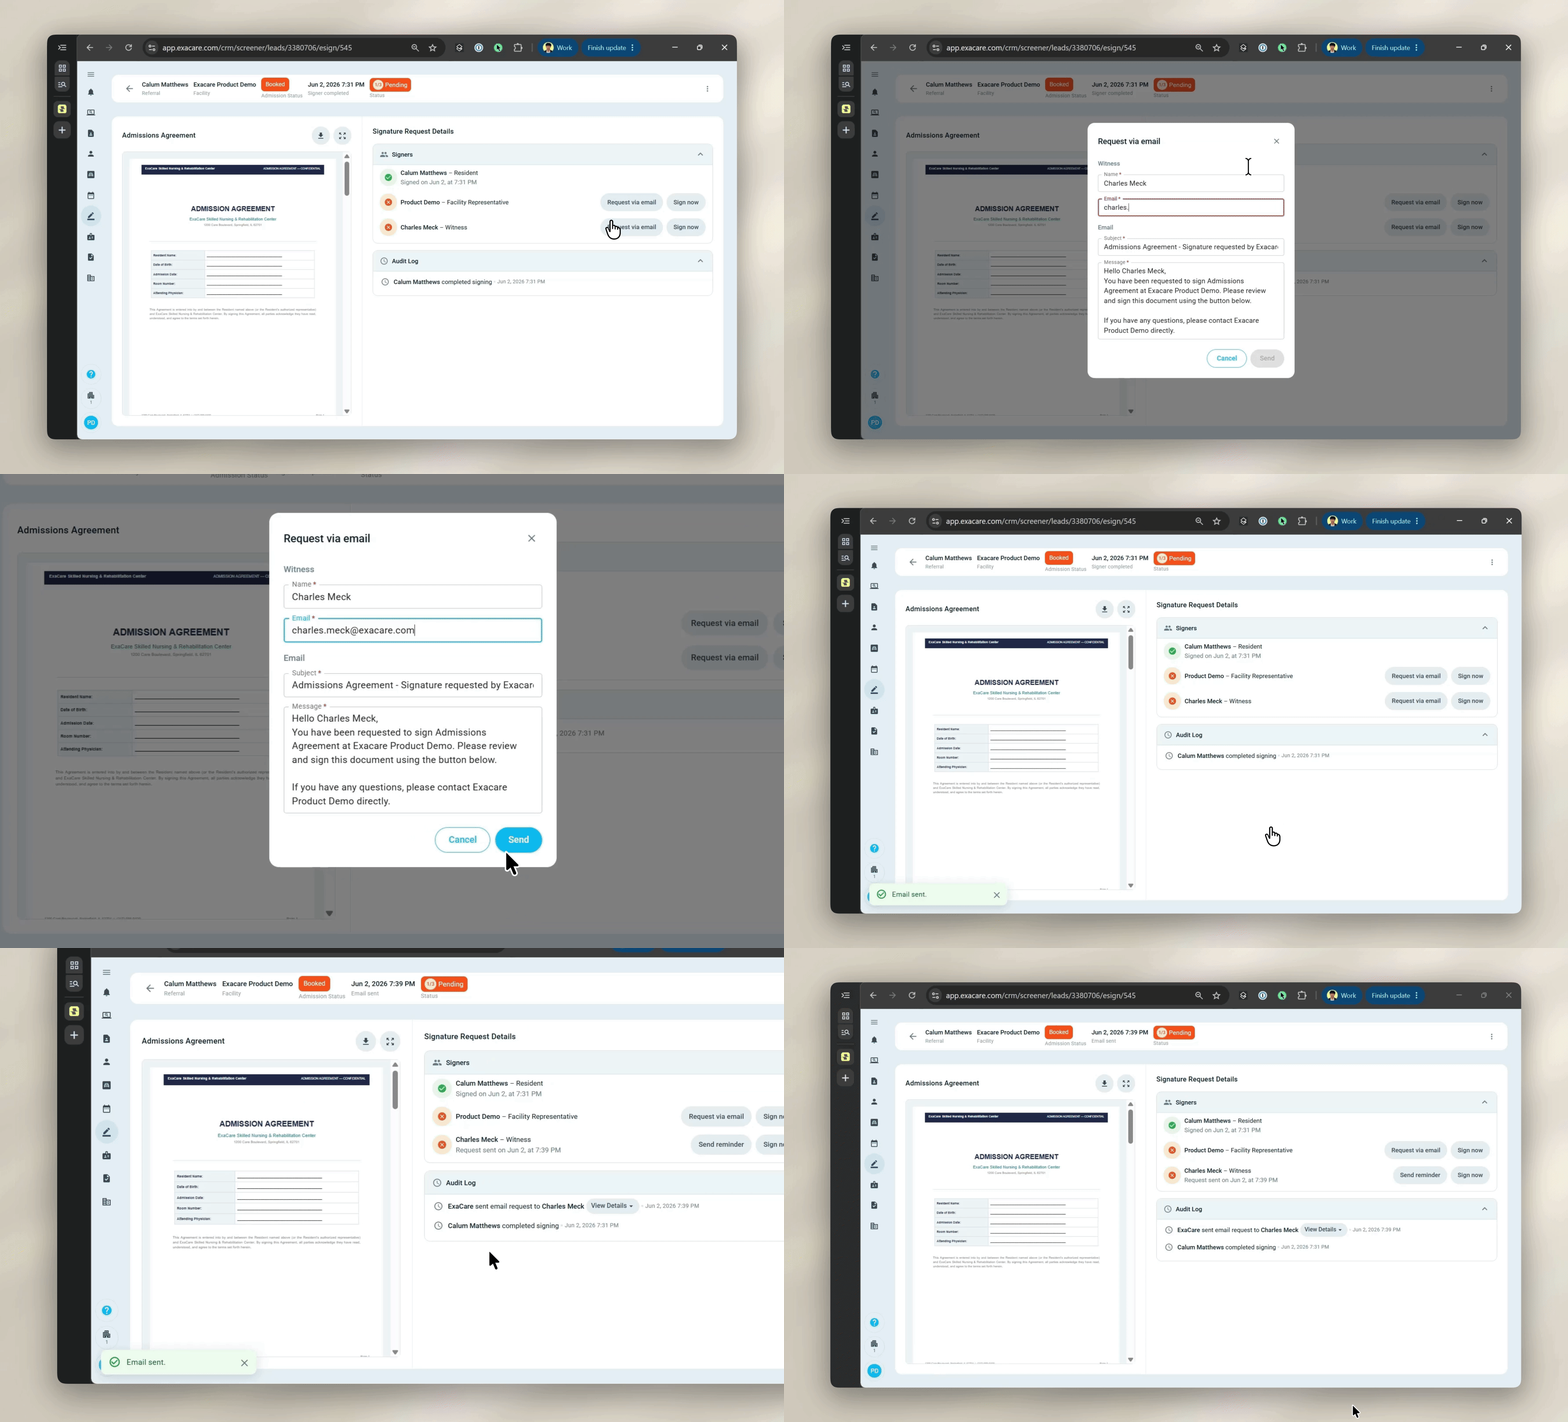
Send. You can either send the signature by clicking Request via email which will send an email with a secure signature link, OR you can click Sign now to sign in-person on the same device.
Finalize the email before sending. A default email template is already provided and can be edited. Once a request is sent, the email cannot be updated. If you used the wrong email, cancel the request and create a new one.
What the signer receives and does
Each signer gets an email from exacare with a subject line indicating the document and the resident's name. The email contains a secure link to the document.
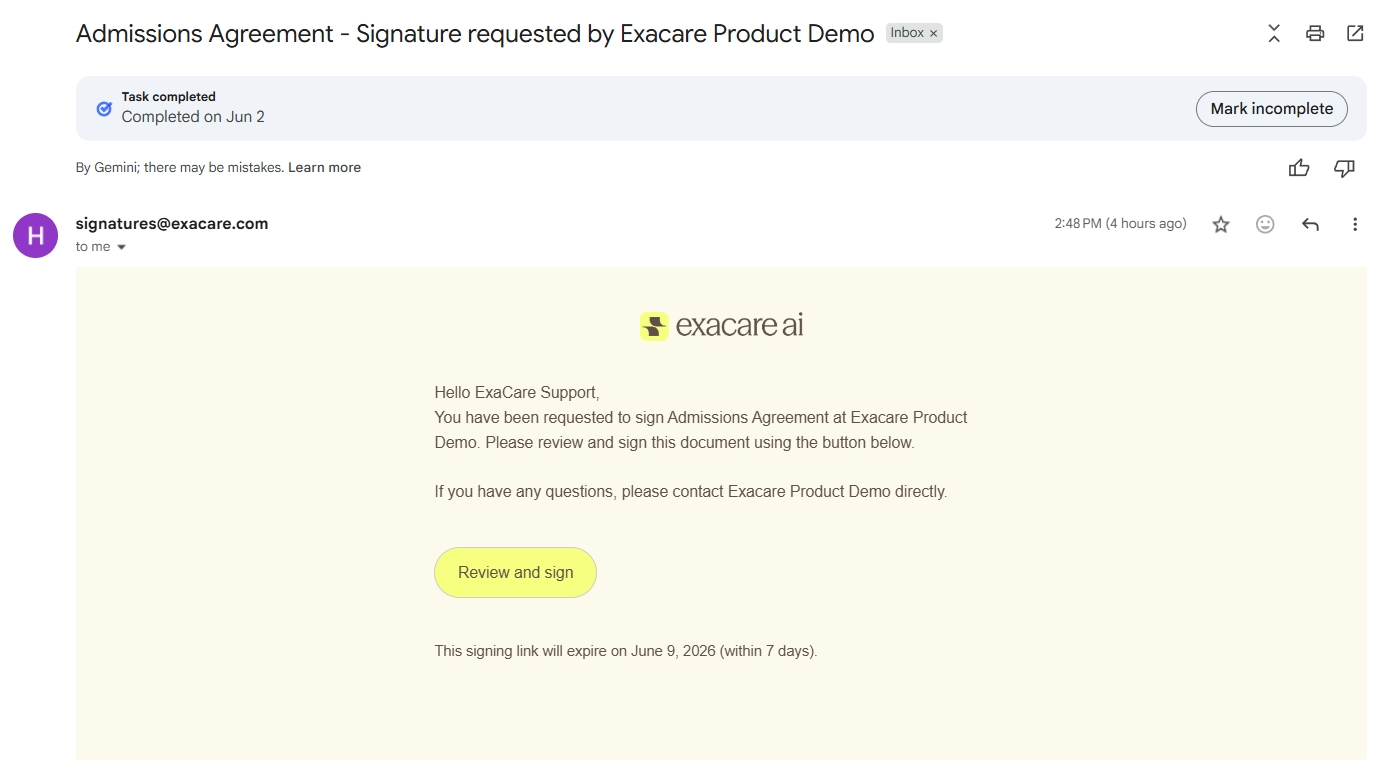
Please Note: No account or login is required. The signer can open the document from any device with a web browser.
After clicking the link, the signer will:
Be prompted to begin signing the document
See the document with sender values already in place (for example, the resident's name and admission date).
Move through the document, completing any required signer fields. Click the blue "Next field" button at the bottom right to skip ahead to the next field that requires your signature.
Initial or sign in the designated areas by selecting "Type" or "Draw" respectively.
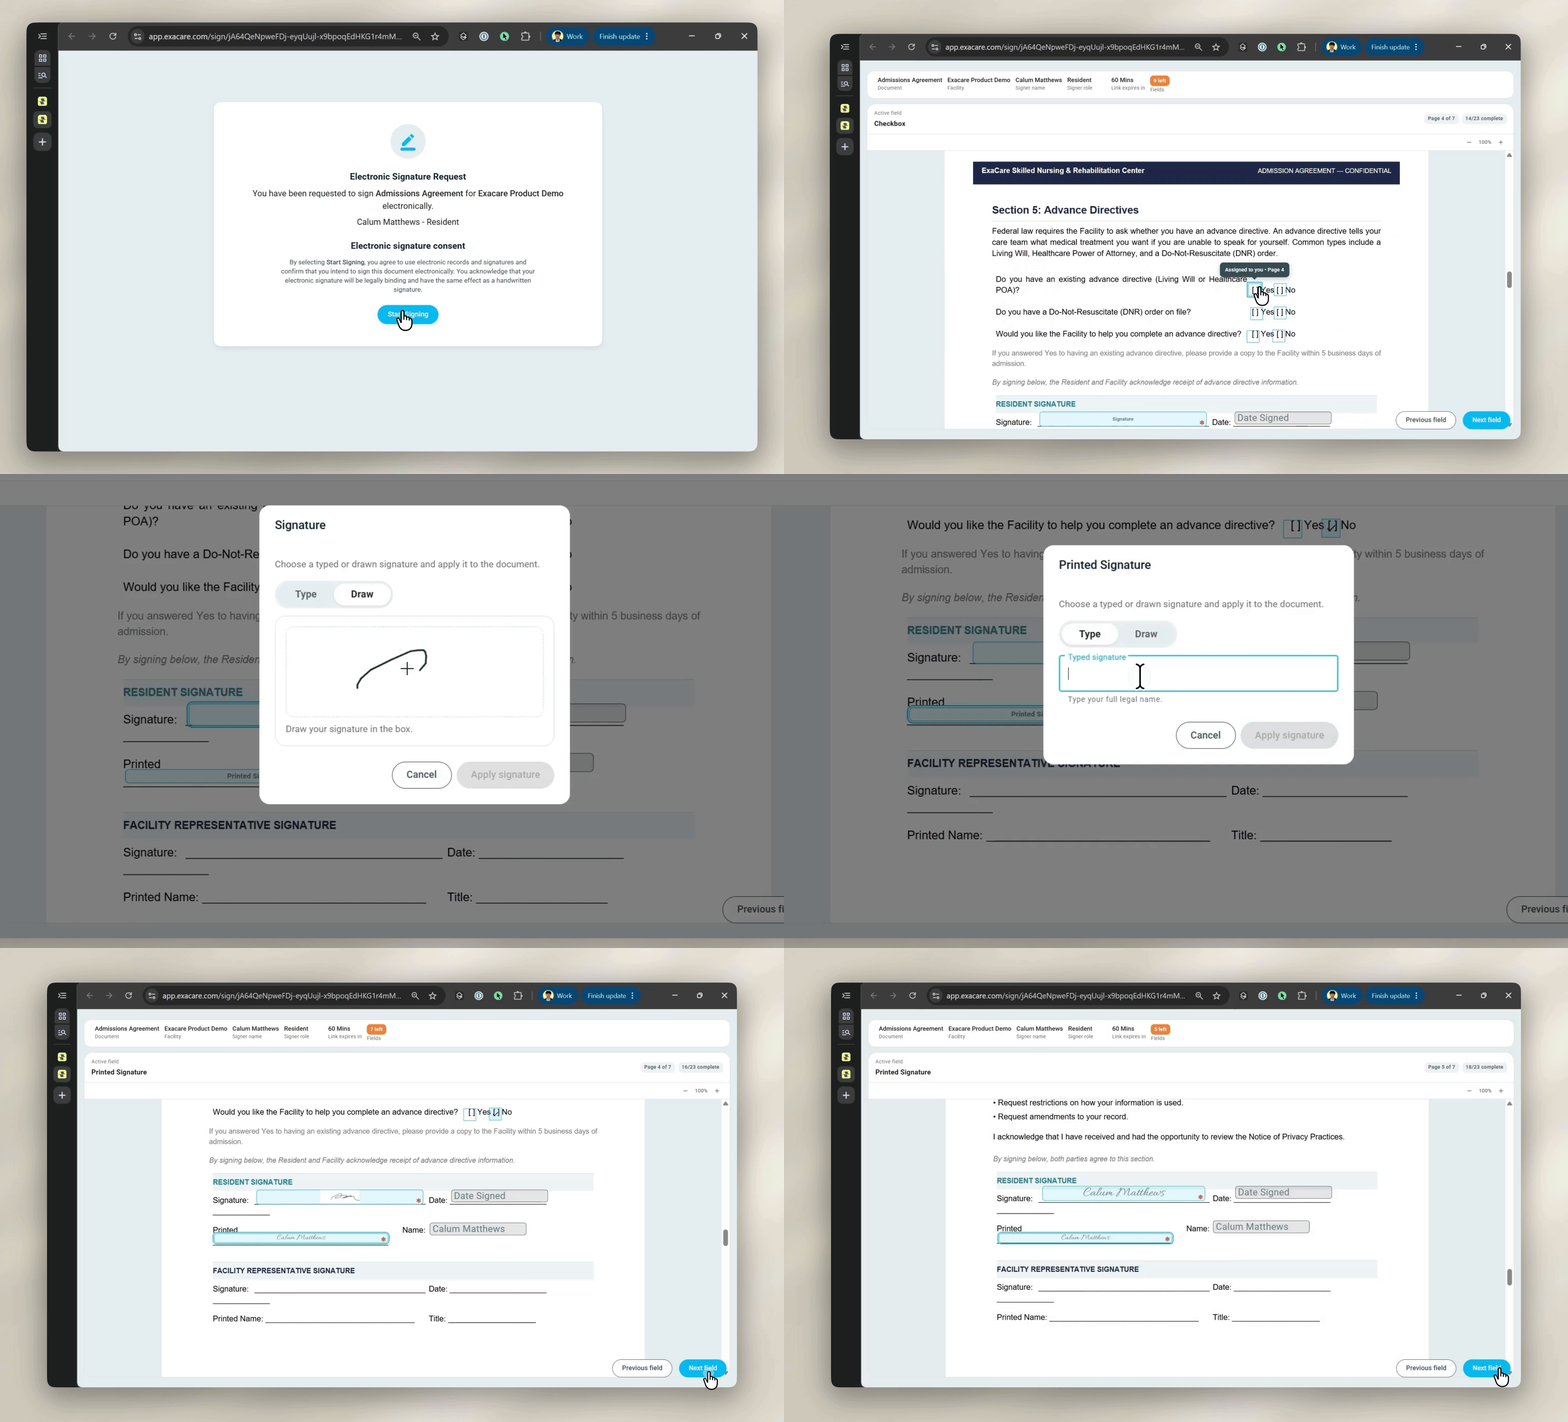
Once all required fields have been completed (indicated by the required field counter displayed in the top right turning green), the "Complete Signing" button will be highlighted in blue. Review the completed document and submit.
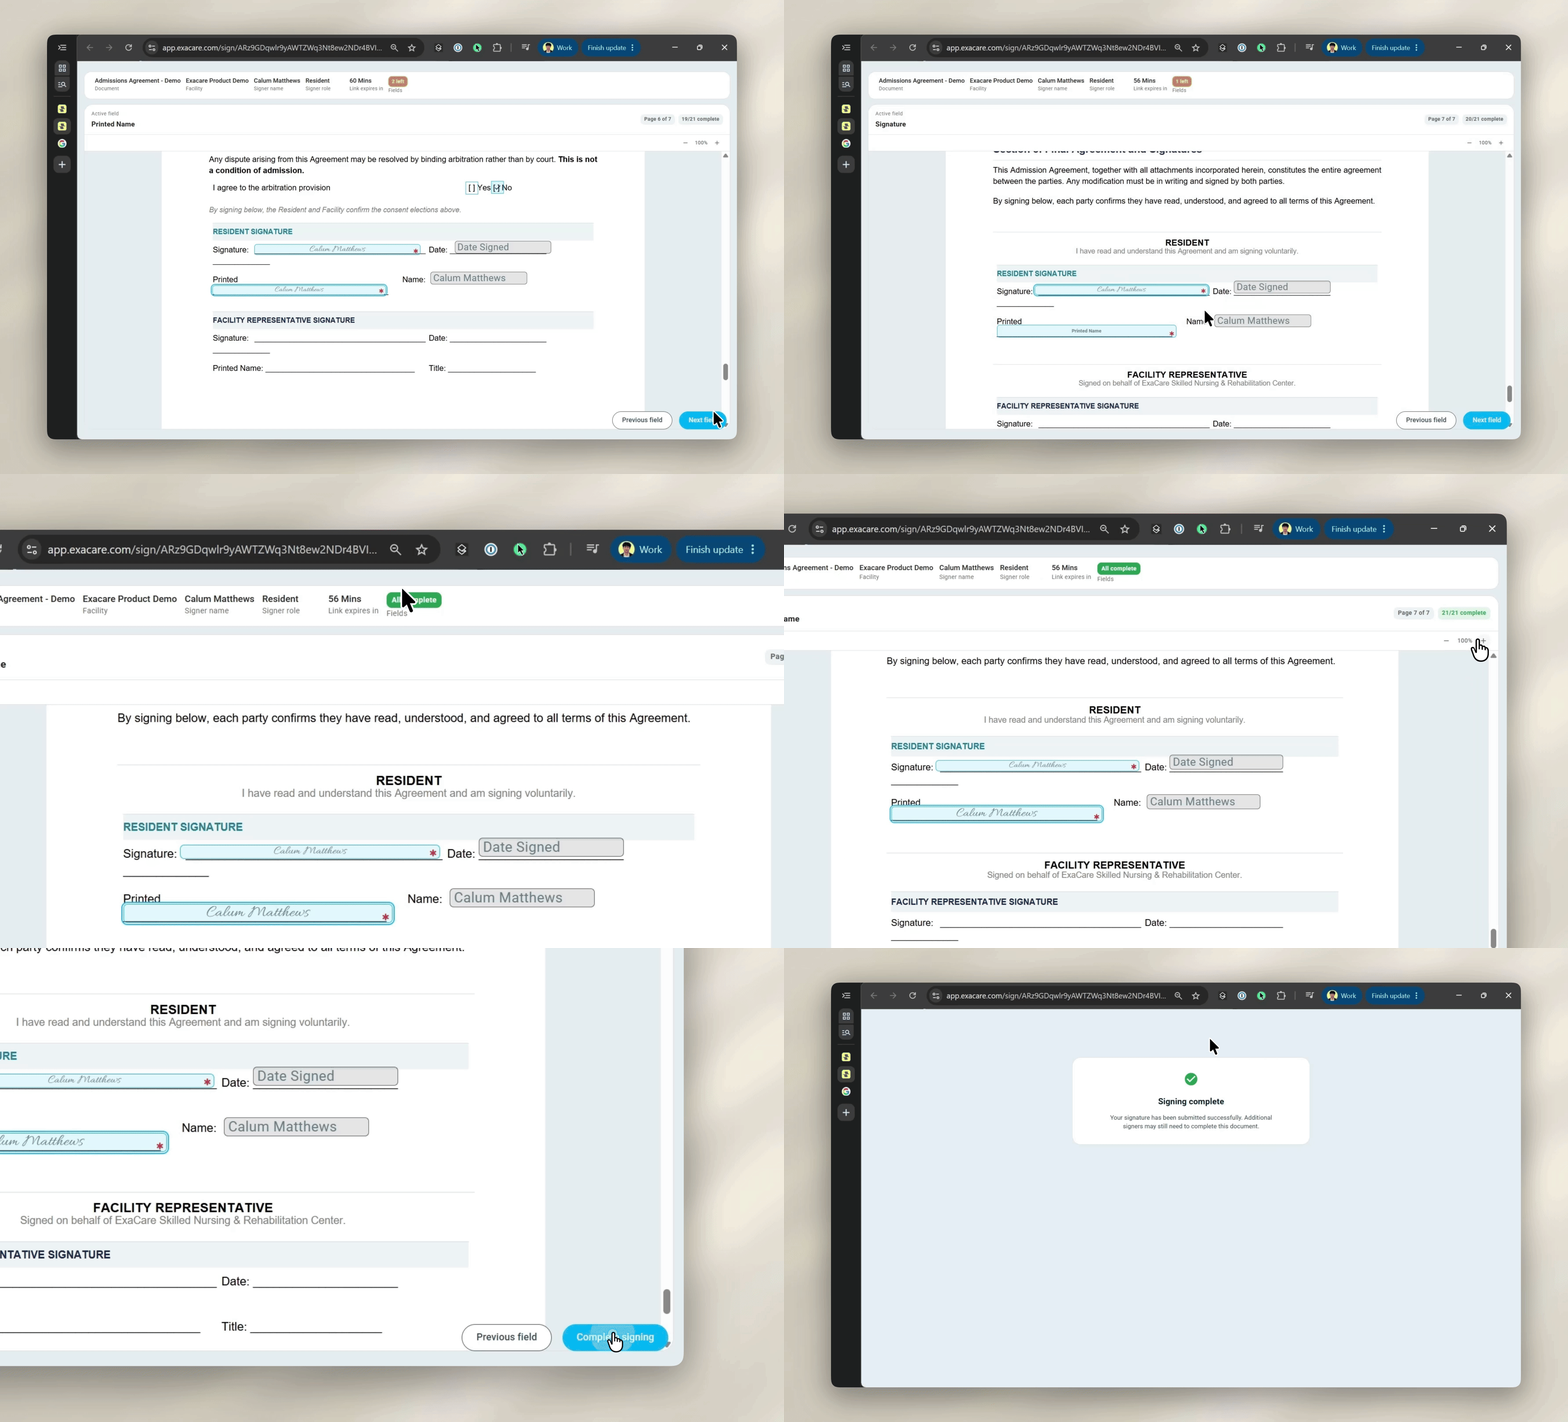
Email links are valid for 7 days after they are sent. Until the request is completed, cancelled, or the link expires, a signer can close the document and return to it later from the same link.
Tracking requests in the eSign grid
Go to eSign in the left-hand taskbar to open the grid. Every request has one of four statuses:
Status | Meaning |
|---|---|
Incomplete | A draft request has been created (when a referral was Booked or Moved-In), but it has not been finalized |
Pending | The request has been finalized, but at least one signer has not completed it yet |
Signed | The document is fully signed and available to download |
Cancelled | The request was cancelled before completion |
Filtering
Use the filters and search bar at the top of the grid to narrow by:
Resident name
Admission status
Document name
Signing status (Incomplete, Pending, Completed, Cancelled)
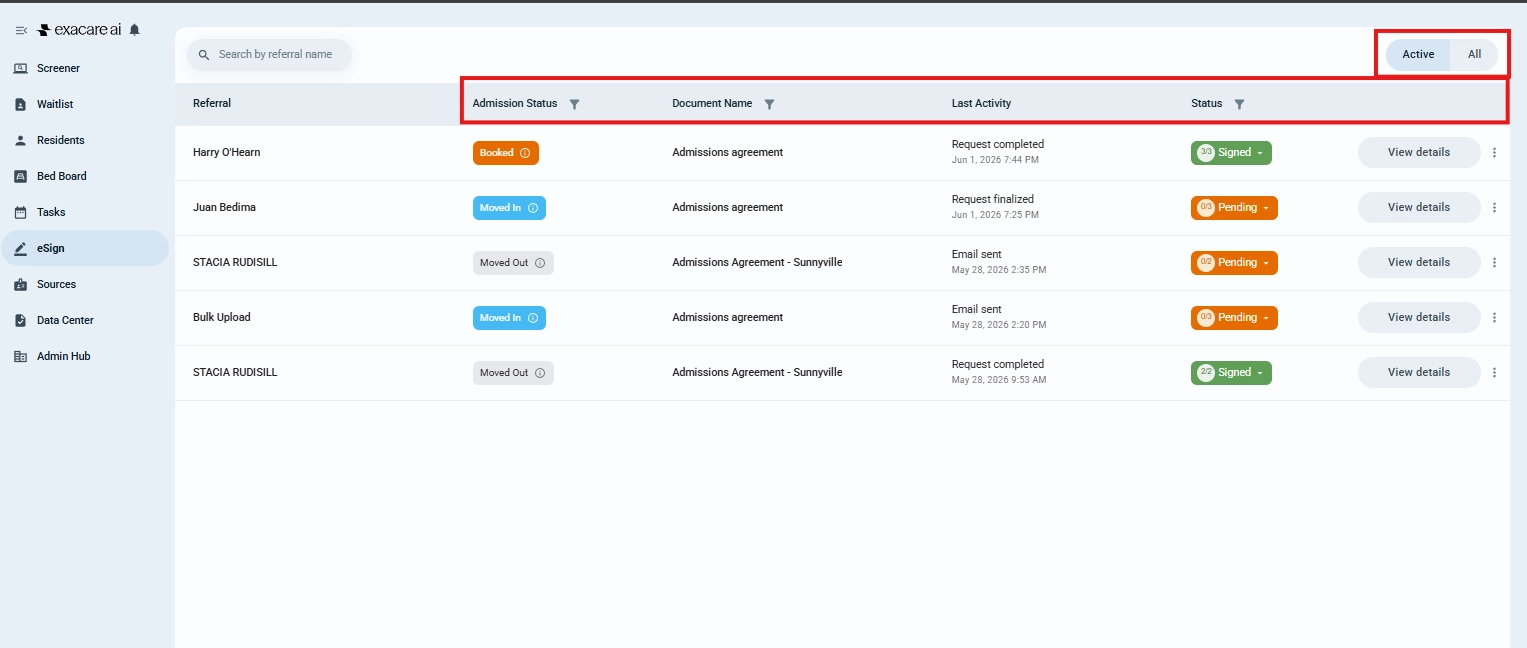
Viewing a specific resident's requests
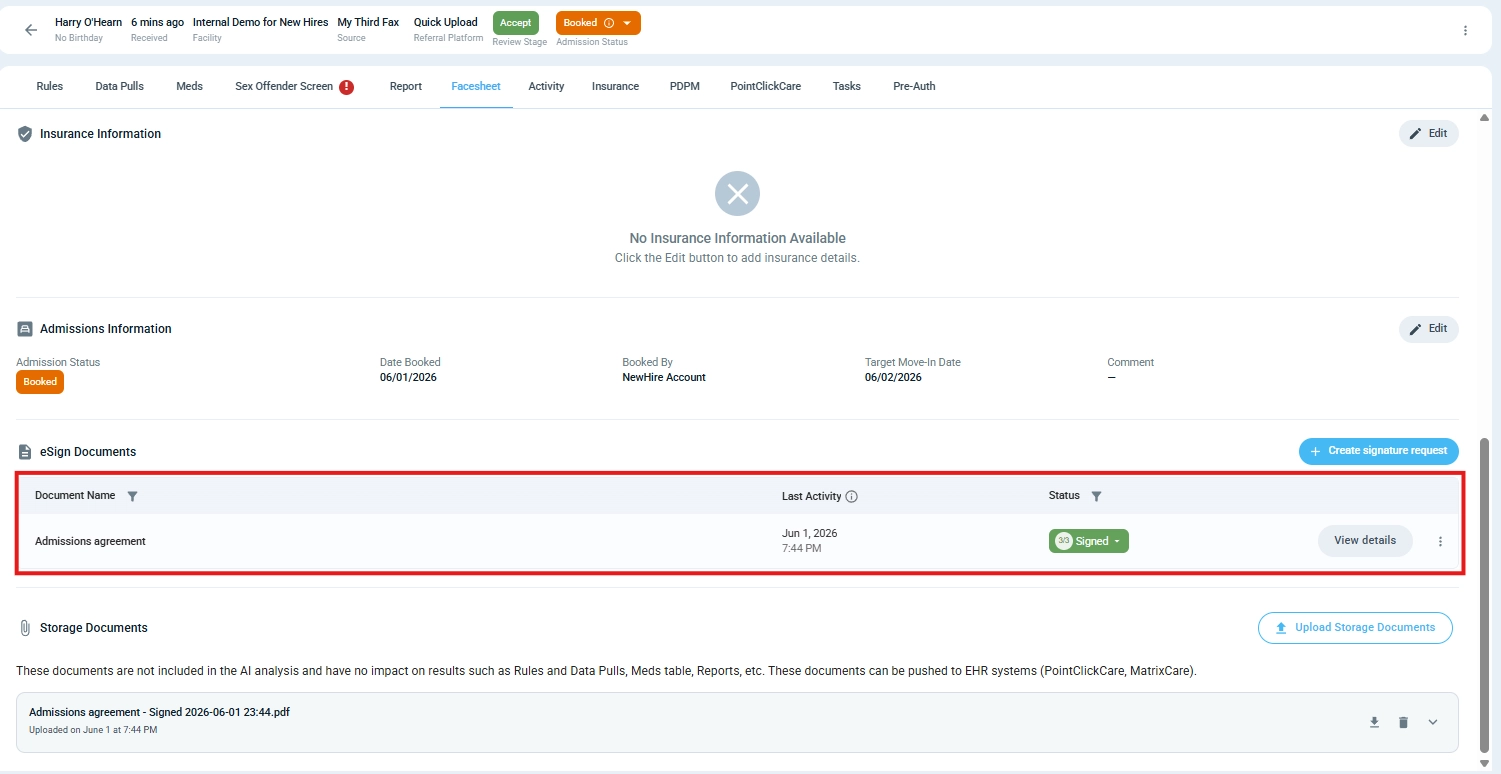
You can also view signing requests directly from the referral. Open the referral and navigate to the bottom of the Facesheet tab to see all requests for that resident.
Reminders and cancellations
Depending on a request's status, you can take different actions from the request management page.
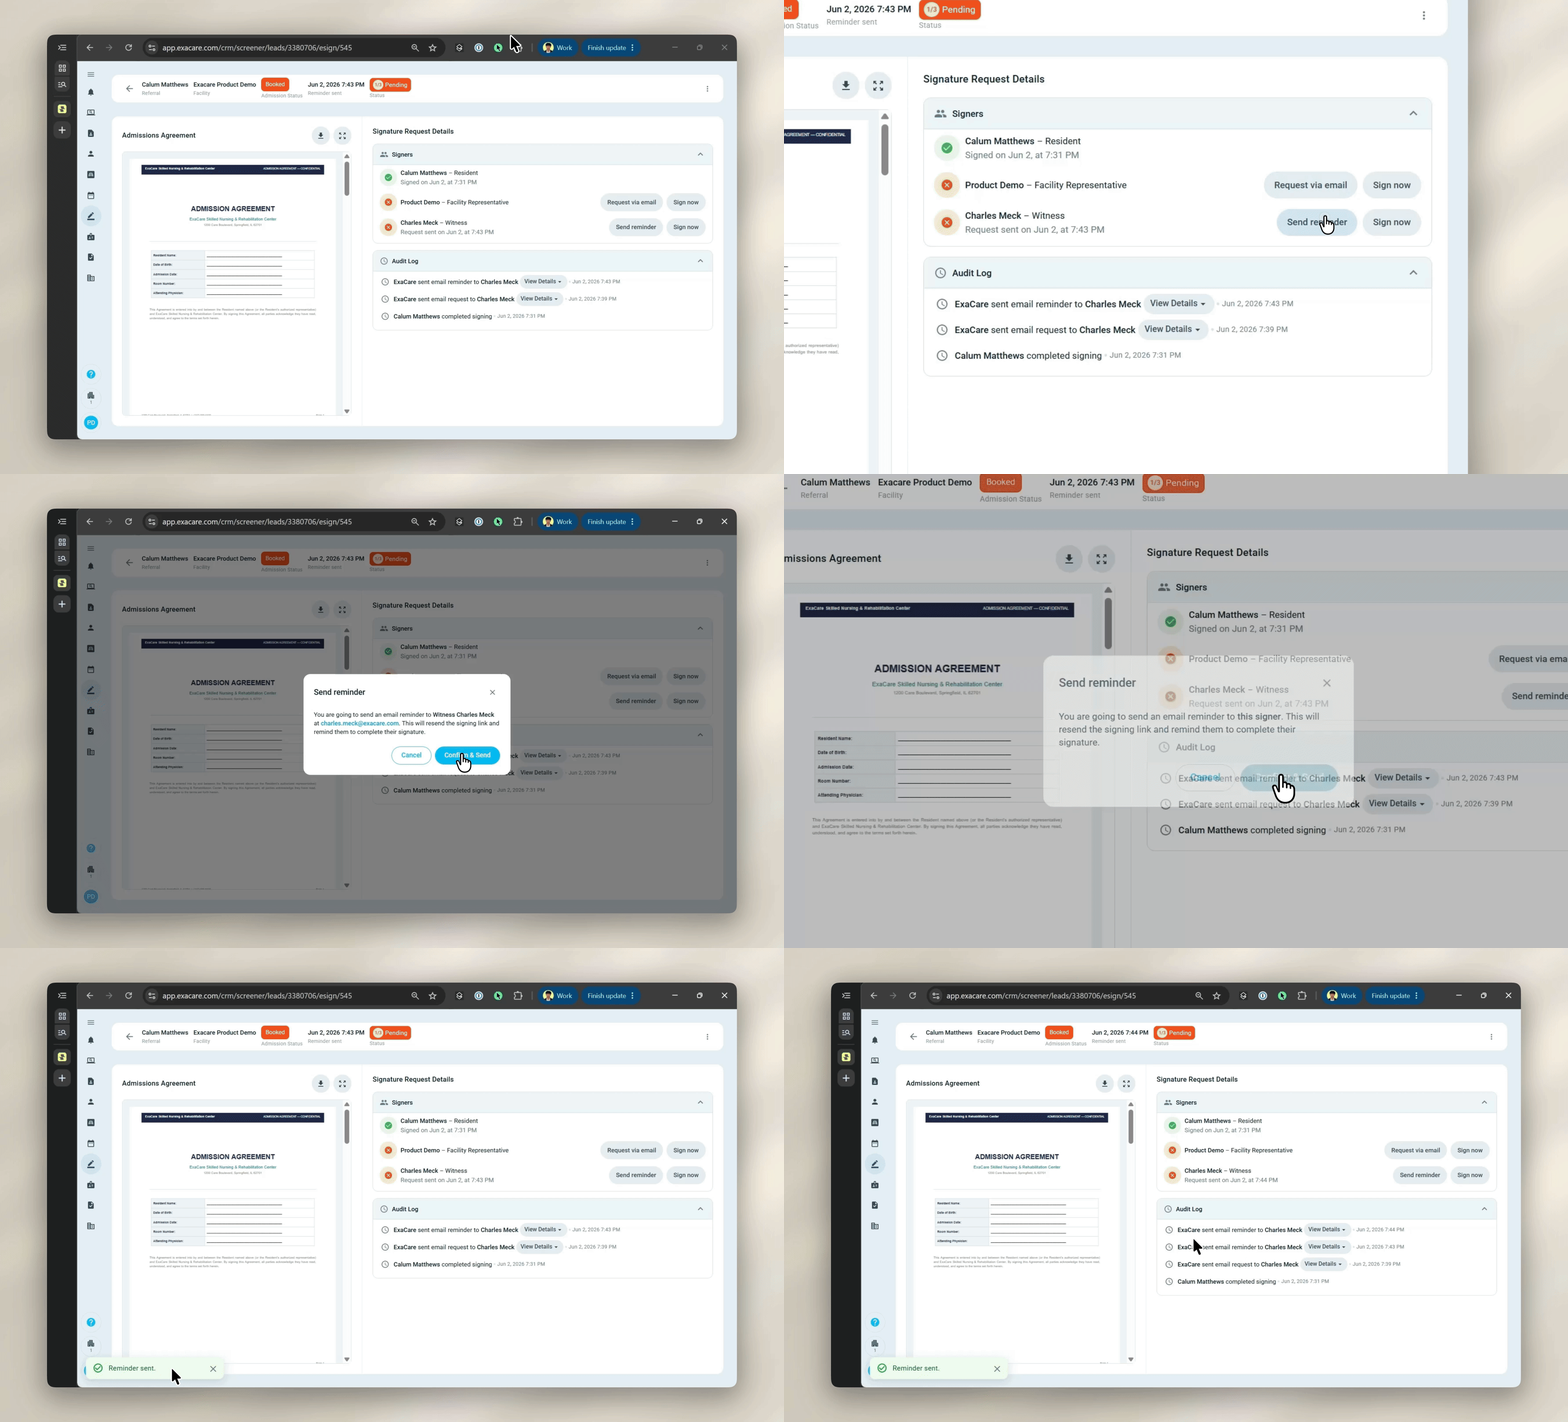
Send a reminder (Pending only): resends the email link to the signer. The new email includes a fresh link.
Cancel (Incomplete or Pending): marks the request as cancelled. The signer's existing link stops working immediately.

Download (Completed only): download the signed PDF, including the appended audit trail.

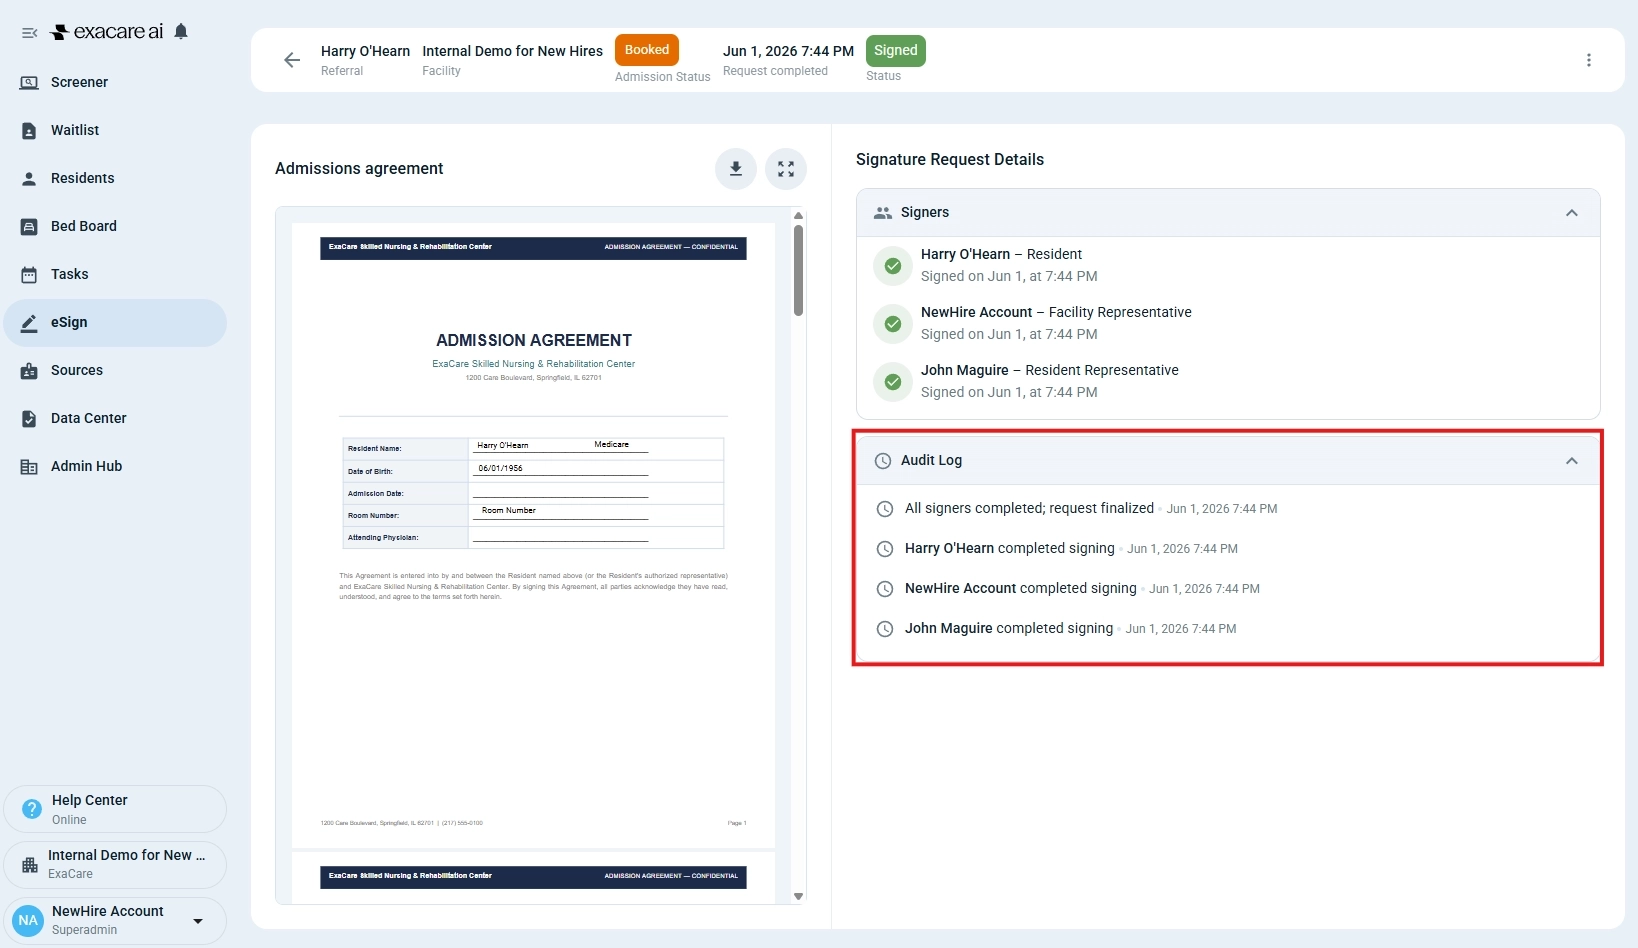
View details: open the request management page to see the full history.

If a signer says they never received the email, use Send a reminder to resend. Ask them to also check spam.
Completed documents
When all signers have submitted:
The request status changes to Completed.
A final PDF is generated that includes the signed document plus an audit trail.
The document is available to download from exacare immediately.
If your facility has EHR integration configured, the completed PDF and audit trail can be pushed to PCC or MatrixCare from exacare from either the eSign grid or via the "Push to EHR" feature. Automatic EHR push is coming soon.
The audit trail
Every completed document includes an audit trail appended to the end of the PDF. It records:
The signer's name and email address.
The date and time of each signature.
The IP address and device used.
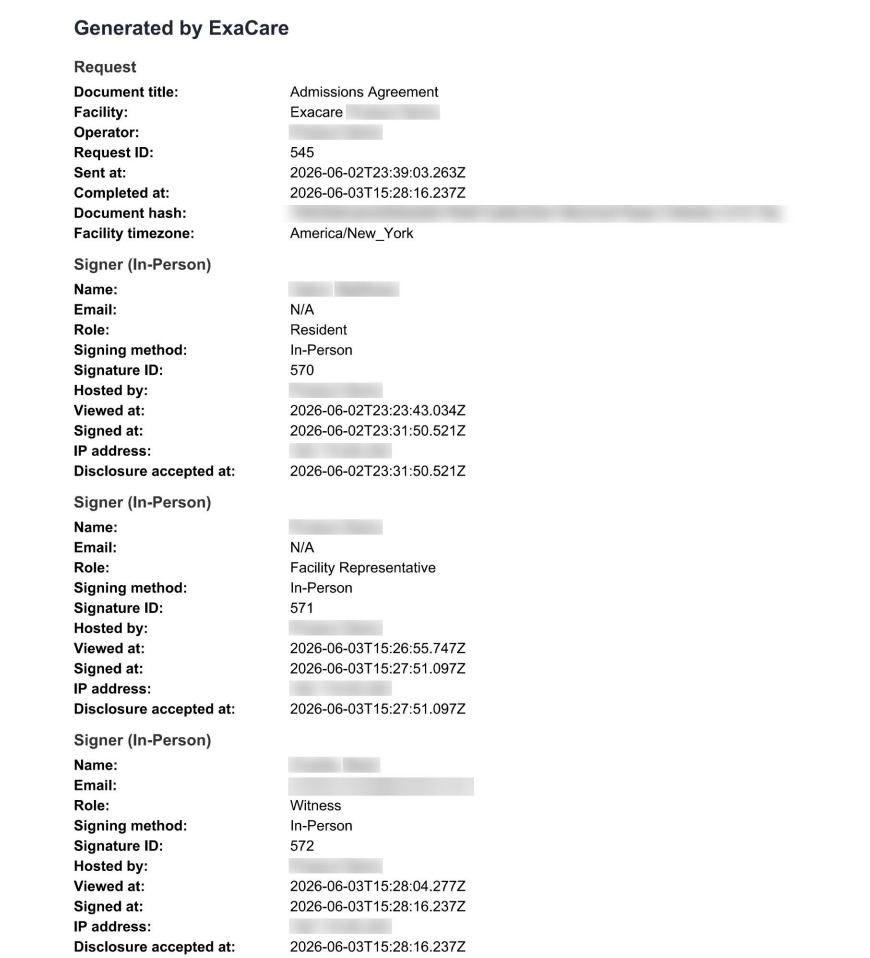
This provides a legally defensible record of the signing event.
EHR upload
Exacare integrates with PointClickCare (PCC) and MatrixCare. When integration is enabled, completed documents can be uploaded to the resident's chart through one of two ways:
From the eSign grid
Navigate to the eSign grid via the taskbar on the left
Confirm that the document status shows “Signed” for the referral whose documents you’d like to push to your EHR.
Click the three dots on the far right and select "Push to MatrixCare/PCC"
From the referral's "Push to EHR" tab
Confirm the document status shows “Completed”
Push the referral from exacare to your EHR
Select the completed eSign document along with any additional documents you would like to push
Complete the push to your EHR
After a document is pushed, a pushed to EHR chip will show up in the status column
Please Note: EHR integration must be configured before one-click EHR push is available. Automatic EHR push is coming soon. Contact your exacare account manager if you are unsure whether this is set up for your facility.